How to Record Minecraft in 1080p & 4K: Best Settings Explained

Learn how to record Minecraft in 1080p and 4K without lag or dropped frames. This step-by-step guide shows you how to optimize settings, balance visuals and performance, and use Insights Capture to record smooth, high-quality Minecraft gameplay for YouTube, TikTok, or highlight reels.
Minecraft might look simple at first glance, but it’s one of the most creative and expressive games to record. From cinematic time-lapses of massive builds to fast-paced PvP fights, Redstone showcases, and modded adventures, every world you create deserves to be seen in high quality. Recording in 1080p or 4K brings out Minecraft’s depth, sharper textures, more vibrant shaders, and smooth camera movements make your content look professional whether it’s for YouTube, TikTok, or a highlight reel. The key is finding the right balance between performance and quality. Here’s how to record Minecraft in stunning detail without lag or dropped frames.
Recording Minecraft: Capturing Every Block in Stunning Detail
Minecraft isn’t just a game, it’s a limitless world of creativity where every block, build, and adventure tells its own story. Whether you’re crafting redstone machines, constructing massive structures, or surviving in challenging biomes, learning how to record Minecraft lets you capture and share those experiences in stunning detail. High-quality recordings make your gameplay look professional and help your creativity reach a wider audience.
Watch more: What FPS Should I Record at Gaming: 30, 60, or 120 FPS Explained
How to Record Minecraft in 1080p & 4K
Step 1: Set Up Minecraft for 1080p or 4K Recording
Before adjusting recording software, make sure Minecraft itself is running in the resolution you want to capture.
- Fullscreen mode: Go to Settings > Video > Fullscreen > On.
- Window size: If you prefer windowed mode, drag the game window to exactly 1920 × 1080 (for 1080p) or 3840 × 2160 (for 4K).
- GUI Scale: Adjust this so menus don’t appear oversized in your recordings, medium or large usually looks best.
- Brightness & FOV: For creative or cinematic videos, increase FOV slightly (around 90) and set brightness to 100% for consistent exposure.
If you’re aiming for 4K, remember it’s more GPU-intensive. To keep things smooth, lower non-essential settings like particles, clouds, and smooth lighting.
Step 2: Optimize Minecraft Settings
Once your resolution is set, fine-tune Minecraft’s visuals for clarity and performance.
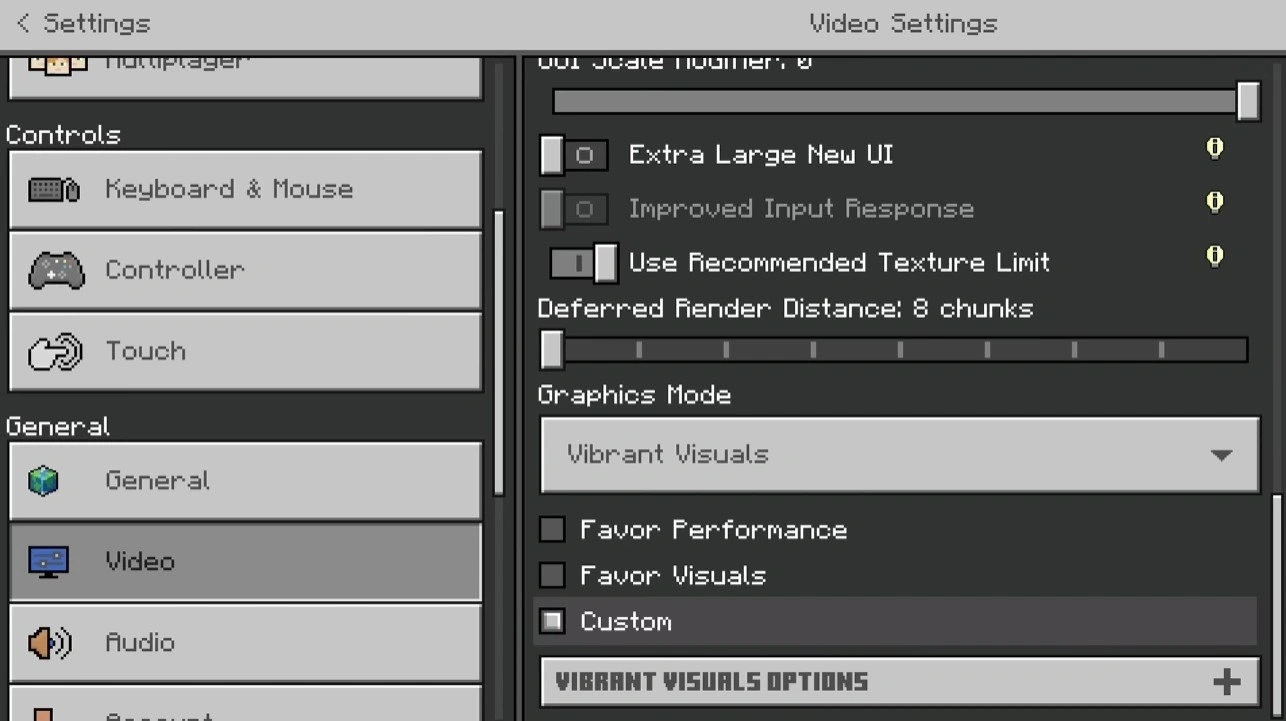
Open Settings > Video.
Recommended tweaks:
- Graphics Mode: Use Vibrant Visuals or Fancy for detailed 1080p/4K footage. Choose Fast for smoother performance.
- Render Distance: 8-10 chunks gives a balanced look without frame drops.
- Favor Performance / Favor Visuals: Pick Favor Performance if you experience lag.
- Custom Mode: Ideal for creators - lets you tweak shadows, particles, and textures individually for the best recording look.
These settings ensure your Minecraft world looks vibrant and cinematic while keeping frame rates stable for recording.
Step 3: Prepare Your System
Before diving into how to record Minecraft, it’s important to prepare your system for smooth performance. Close unnecessary background apps to free up CPU and RAM, and make sure your GPU drivers are up to date for optimal compatibility and speed. Using wired peripherals like a mouse and keyboard can also minimize input lag and make gameplay more responsive. These simple steps help prevent stuttering, frame drops, and performance issues while recording.
Step 4: Record with Insights Capture
Once Minecraft is ready, it’s time to capture your gameplay, and Insights Capture makes it simple. If you haven’t installed it yet, download it from Insights and follow the prompts. This all-in-one tool lets you record, trim, and even save instant replays without leaving the game.
{{button}}
Recording setup:
- Open Insights Capture > Settings > Recording
- Quality Preset: Performance, Balanced, or Quality (Quality is best for 1080p/4K)
- Resolution: 1080p or 4K
- Framerate: 60 FPS
- Bitrate:
- 8,000–16,000 kbps for 1080p
- 20,000–40,000 kbps for 4K
- 8,000–16,000 kbps for 1080p
- Encoder: NVIDIA NVENC or AMD AVC
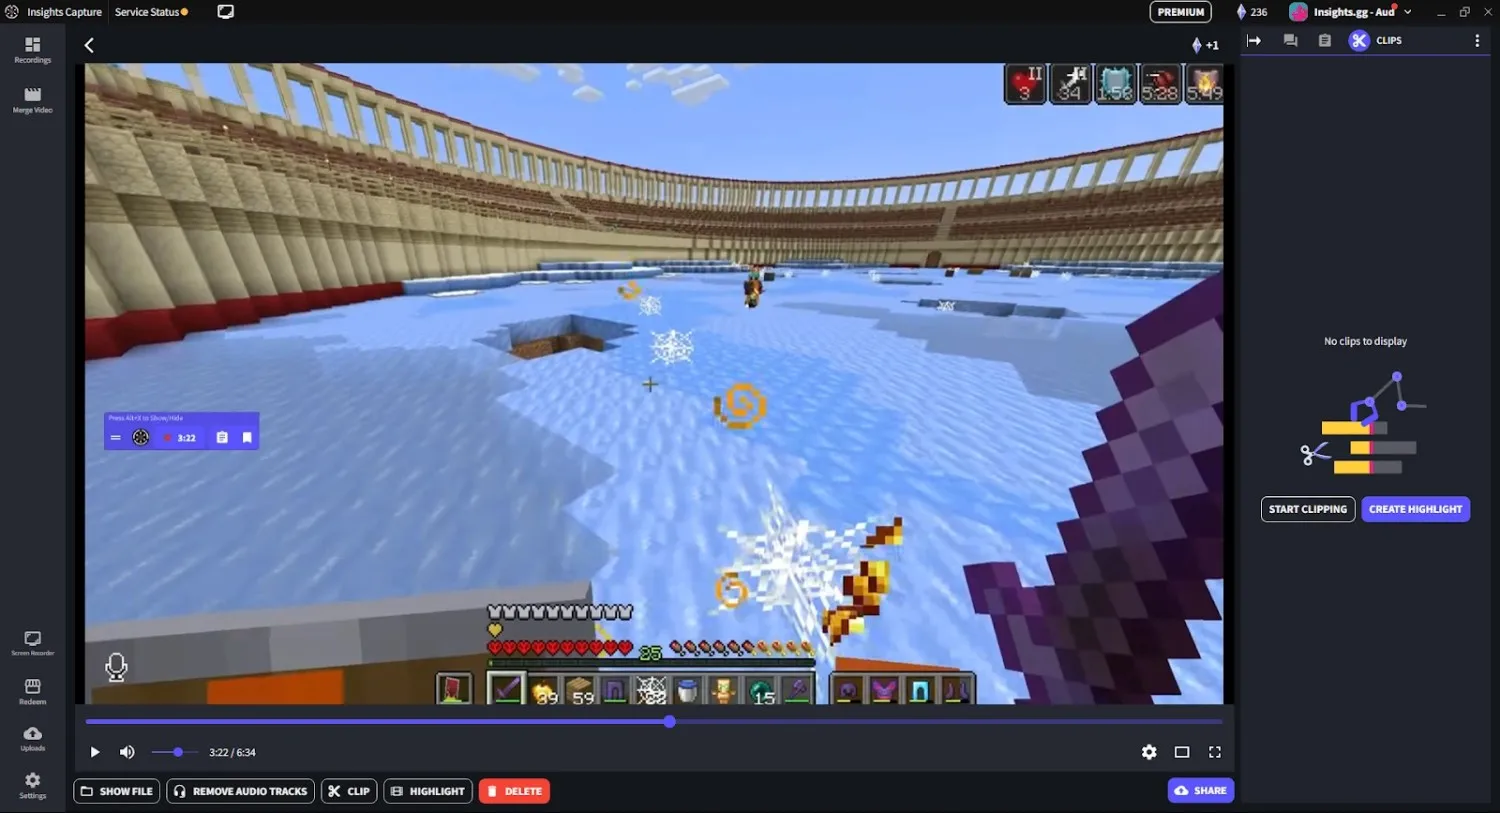
Default Hotkeys:
- F7 = Start/Stop Recording
- F6 = Instant Replay (saves the last few minutes automatically)
- Alt + H = Open Dashboard
Pro Tip: Customize hotkeys under Settings > Keybindings. Instant Replay is perfect for capturing unexpected moments or epic PvP plays. Experiment with Quality Presets and bitrate to find the best balance between performance and visual clarity on your system.
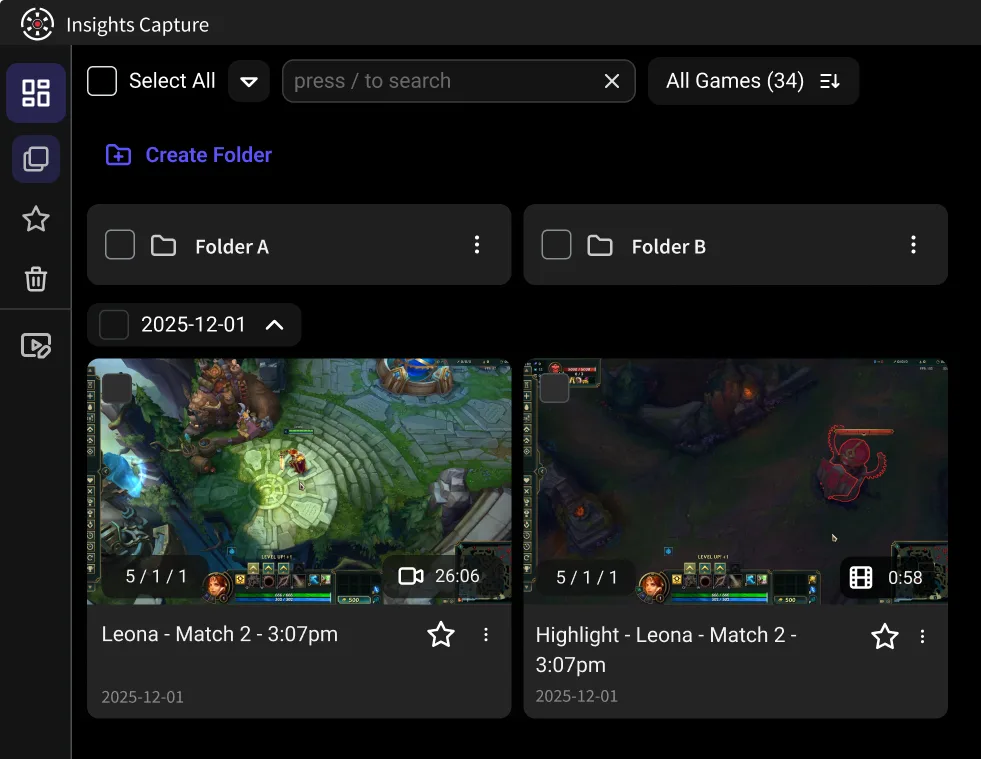
Step 5: Review and Organize Your Recordings
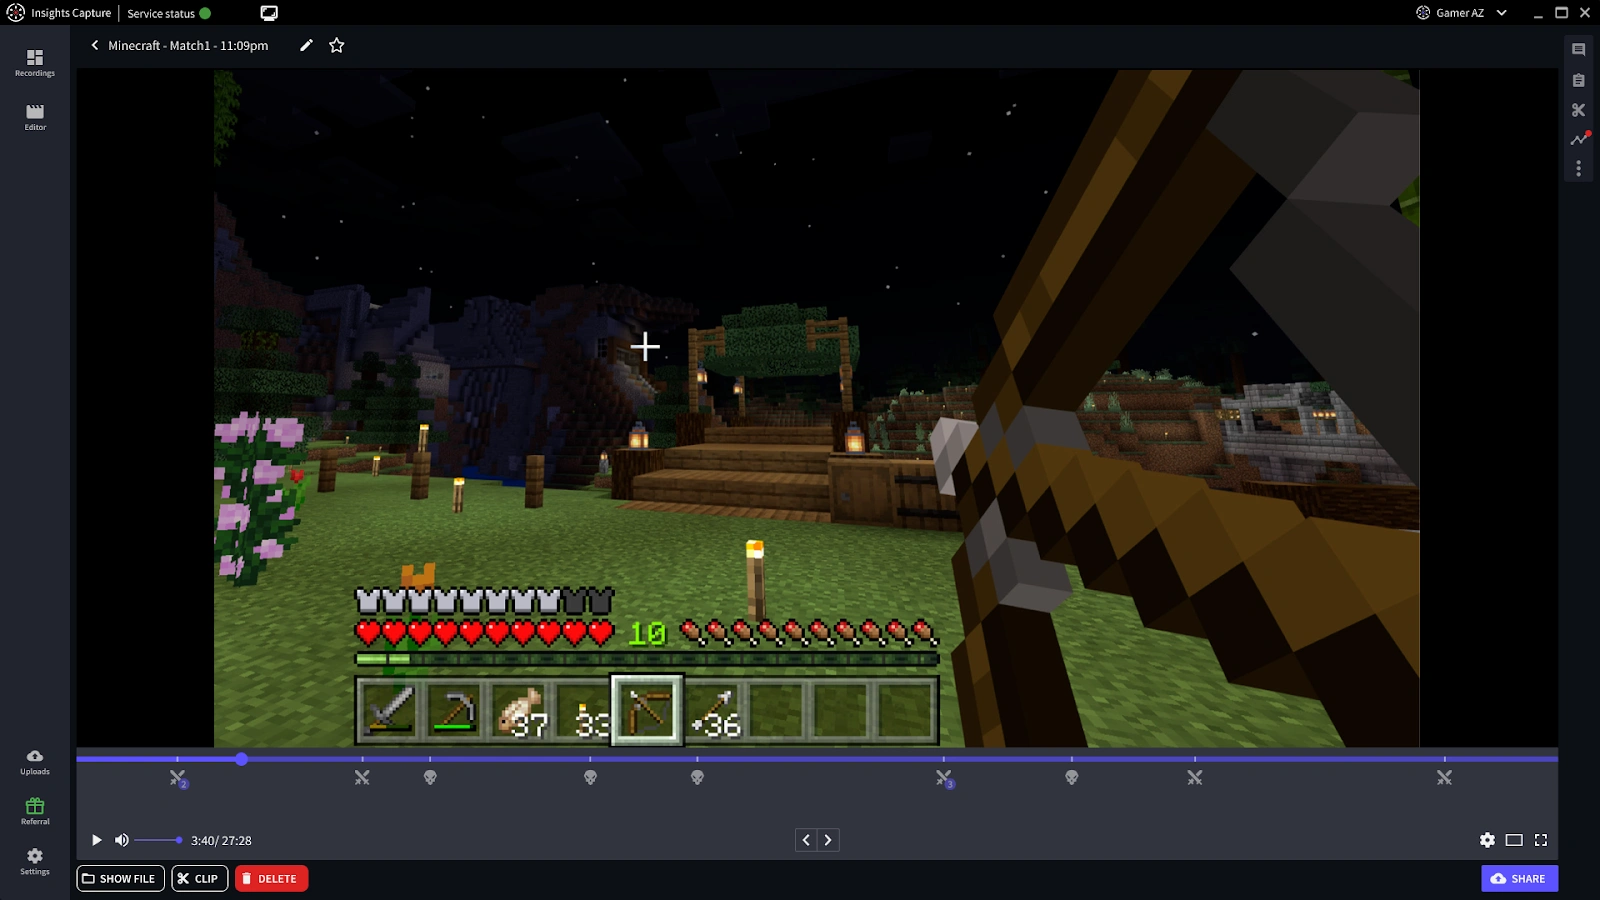
After recording, the best clipping software like Insights Capture makes reviewing your gameplay effortless. You can quickly replay, trim, and organize your clips to highlight your best moments with ease.
- Preview gameplay instantly
- Trim or merge clips for montages or timelapses
- Organize footage by builds, PvP sessions, or cinematic moments
- Export directly for editing or uploading
Everything stays in one place, no extra software needed.
See more: How to Record Gameplay and Yourself at the Same Time Without Lag
Why Insights Capture Is the Best Tool for Recording Minecraft
When it comes to how to record Minecraft without lag, few tools match the balance of quality, performance, and simplicity that Insights Capture provides. Designed specifically for gamers and creators, it ensures your worlds, builds, and PvP battles look as sharp and smooth as you play them, whether you’re recording in 1080p or 4K.
Unlike traditional recorders that drain resources or cause FPS drops, Insights Capture uses intelligent performance optimization and hardware acceleration to keep your gameplay fluid. This means you can explore, fight, and build while recording in cinematic quality, all without losing performance.
Key Benefits for Minecraft Players
- High-Quality 1080p & 4K Recording: Capture every block and detail with crystal-clear visuals. Insights Capture records in full HD and 4K resolution while maintaining stable frame rates, so even your most complex builds or modded adventures look seamless.
- Hardware Acceleration for Smooth Performance: By using GPU-based encoding (like NVIDIA NVENC or AMD AVC), Insights Capture offloads the heavy lifting from your CPU, keeping gameplay responsive and lag-free, even during long sessions or high-action moments.
- Instant Replay for Quick Highlights: Never miss a moment worth sharing. With Instant Replay, you can automatically save the last few minutes of gameplay—perfect for recording spontaneous discoveries, epic Redstone contraptions, or clutch PvP wins.
- Built-In Editing and Sharing Tools: Skip external editors. Trim, merge, and enhance your Minecraft clips right inside the Insights Capture dashboard, then share them directly to YouTube, TikTok, or Discord. This streamlined workflow helps creators post content faster without sacrificing quality.
- Low Resource Usage: Insights Capture runs efficiently in the background, minimizing CPU and GPU usage. This makes it ideal for creators who record long playthroughs, cinematic time-lapses, or large building projects without worrying about stutters or FPS loss.
- VOD Review Tool for Analysis and Improvement: Whether you’re a content creator fine-tuning your storytelling or a competitive player reviewing strategies, the VOD Review tool is a game-changer. It lets you analyze gameplay frame by frame, perfect for studying PvP fights, speedruns, or Redstone builds in detail.
With its smooth recording performance, intuitive interface, and creator-focused tools, Insights Capture is more than just a recorder, it’s a complete content creation companion for every Minecraft player who wants professional results without complexity.
FAQs: How to Record Minecraft
1. What’s the best resolution to record Minecraft in?
For most players, 1080p is the sweet spot, offering clear visuals and smaller file sizes. However, if you’re creating cinematic videos or professional-quality showcases, recording in 4K gives your content added depth and crispness.
2. How do I record Minecraft without lag?
To record Minecraft smoothly, use Insights Capture with GPU-based encoding (like NVENC or AMD). This reduces CPU strain and maintains consistent FPS even when exploring detailed worlds or running shaders. Adjust your bitrate based on your system performance for best results.
3. Can I use Instant Replay in Minecraft?
Yes! Insights Capture’s Instant Replay feature lets you save the last few minutes of gameplay automatically. It’s perfect for unexpected highlights, like uncovering rare biomes or landing a perfect PvP combo.
4. What FPS should I record Minecraft at?
Recording at 60 FPS is ideal. It delivers smooth motion that looks great on platforms like YouTube or Twitch without overloading your hardware. If you’re creating slow-motion edits, you can record at higher frame rates for more flexibility.
5. Is Insights Capture free?
Yes. Insights Capture offers a free version that includes professional-grade recording, instant replay, and editing tools. You can also upgrade to premium for advanced features like cloud storage, collaboration tools, and enhanced editing options.
Final Thoughts
Learning how to record Minecraft in full HD or 4K doesn’t have to be difficult. With the right in-game settings and Insights Capture, you can produce smooth, lag-free footage that highlights every detail of your builds, battles, and adventures. Whether you’re creating cinematic montages or streaming survival worlds, Insights Capture makes it effortless to record, edit, and share your best Minecraft moments, all without ever leaving the game. Contact us today to learn how Insights Capture can help you record and share your Minecraft adventures like a pro.